
Emailing Payslips
The email payslips feature in CollSoft Payroll enables you to do the following;
- Send employee payslips by emails using a simple 5 step Wizard.
- Protect each payslip with an individual password.
- Send copies of all payslips to specified people.
- Attach extra documents to each payslip email.
- Store copies of the emailed payslips in Microsoft Outlook.
Before you can start sending Email Payslips there are some settings that you must specify.
Email Server Settings
There are a number of settings that must be specified in CollSoft Payroll before you can begin sending Email Payslips.
These settings can be accessed by selecting the Email Settings option in the Tools menu in Payroll, you will see a screen similar to that shown below:
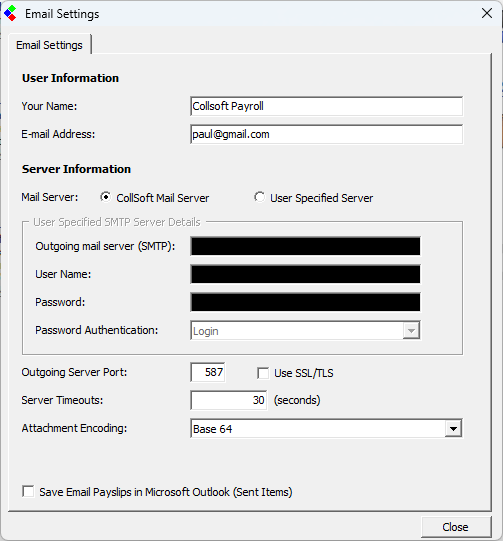
Email Payslips: User Specified Server Settings Screen
The individual settings are as follows:
Your Name: The name which will appear in the From line of each email that is sent.
E-mail Address: The Senders email address.
Mail Server: By default payroll will send email payslips using an email server hosted by CollSoft designed specifically to send payslips. Selecting the 'Collsoft Mail Server' option will instruct the payroll to email the payslips using the Collsoft hosted mail server and will gray out the User Specified Server fields as they are automatically populated with the Collsoft mail server details.
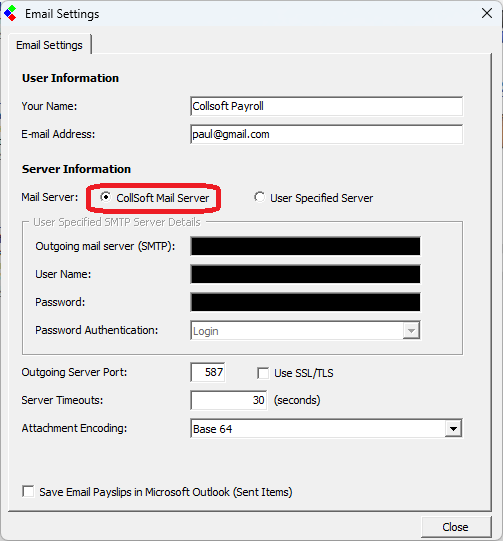
Email Payslips: Collsoft Mail Server Settings Screen
The user can specify their own mail server by selecting the "User Specified Server" option and completing the following required information;
Outgoing mail server (SMTP): This is the name or IP address of your outgoing email server. This information will have been provided to you by your Internet Service Provider (ISP), and is the same as specified in your email client software (Microsoft Outlook or Outlook Express)
You may also use the name of an Exchange mail server on your company's internal network where applicable.
Username/Password: This is the username and password required to log onto your mail server. Again, this information will have been supplied to you by your ISP or network administrator, and it will be the same as the username/password in Outlook/Outlook Express.
Note: If you are using an Exchange SMTP server on an internal network, you should provide your LAN username and password in these fields.
Password Authentication: This is the method by which passwords are sent to the email server. In most cases this will be Login (which is the default option) and should not be changed unless you are specifically required to. The possible options available are:
None - No password authentication are required.
POP - Authentication via POP3 session.
Login (Default) - Default authentication method.
Plain - Passwords are sent as plain text.
Server Timeouts: The time (in seconds) that Payroll will attempt to establish a connection with your mail server before giving up.
Outgoing Server Port: The TCP port on which your SMTP server is listening. The default value for this setting is 587, you should not change this value.
Save Email Payslips In Microsoft Outlook: This option is only available if you have Microsoft Outlook Installed on your PC - it will not be available for Outlook Express. When selected, Payroll will save a copy of each email sent in a special folder called Payslips located in your Sent Items folder. This folder is further broken down by tax year, company, period type (weekly, monthly etc.) and period number, making it easier to find individual items.
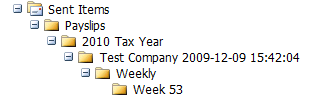
Email Payslips: Save Emails in Outlook
Employee Settings For Email Payslips
Before you can start sending Email Payslips you will have to update the following details in every employee to whom you will be sending payslips to. Two new fields have been added to the Employee Details screen for this purpose:
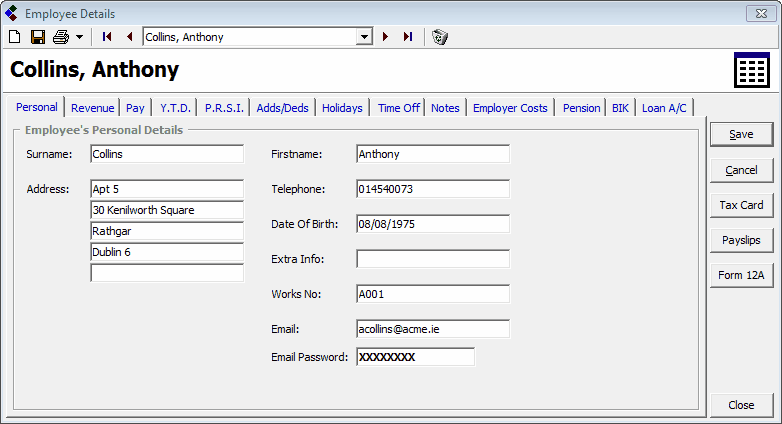
Email Payslips: Entering Employee's Email Address
The new fields are:
Email Address:
This field allows you to specify one or more email addresses for each employee. Multiple addresses can be entered by using commas or semi-colons (;) between the various addresses. For example, if you wanted to enter name1@acme.com and name2@acme.com as two addresses for a single employee, you would enter these as either name1@acme.com;name2@acme.com or name1@acme.com,name2@acme.com
Email Password:
This is the password that will be used to lock any payslips sent to this employee. This means the employee will need to enter the assigned password before they can view their PDF payslip.
These passwords should be communicated/agreed with each individual employee.
Please note: Passwords are not required, but we recommend using passwords for added security and privacy. Passwords are case sensitive.
Finally, when you are sending a batch of email payslips it is possible to apply a Master Password which will allow you (or anyone else with the correct password) to view any payslip without knowing the individual employee's password. This is useful if you are providing a payroll bureau service, and you want to send copies of the payslips to the relevant employer.
Sending Email Payslips
You will need to follow the steps outlined below to begin sending email payslips:
Step 1 - Run The Payroll
Run your payroll as you would normally do and click on the Payslips button to bring up the Print Payslips screen:
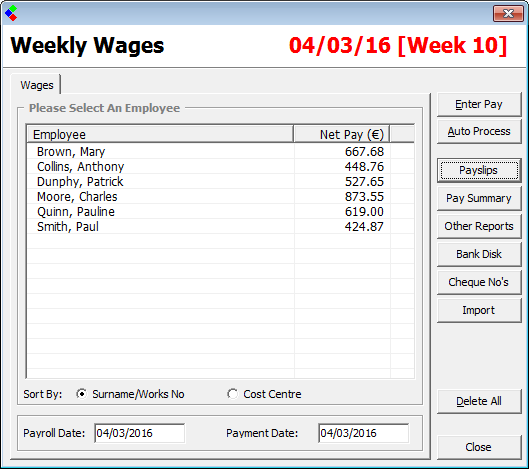
Email Payslips: Click on the Payslips Button
Step 2 - Select the employees to be included in the batch
Confirm the employees that you want to send the email payslips to by making sure there is a tick in the box in front of their name. Select the Email option in the "Print to" section. Click "Print Payslips" to start the Email Payslip wizard.
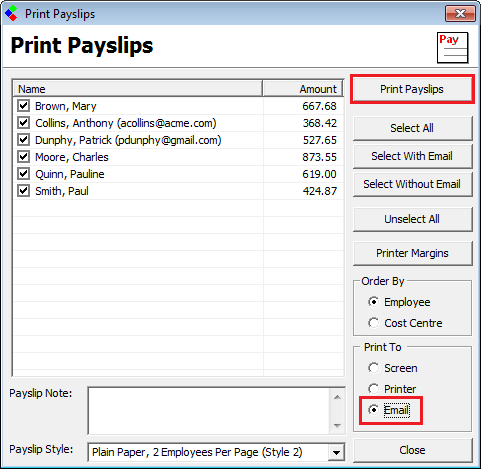
Email Payslips:Click Print Payslips
Step 3 - The Email Payslip Wizard
The Welcome to the Email Payslip Wizard screen appear, please press the Next button to continue.
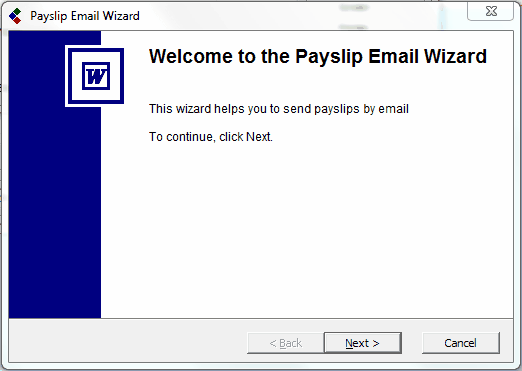
Email Payslips: Payslips Email Wizard begins
Click Next> to Continue....
Step 4 - Confirm Senders name and Email Address
Confirm that the senders name and email address are correct.
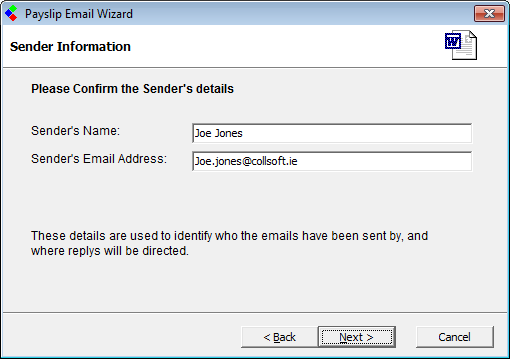
Email Payslips: Senders name and email address
Click Next> to Continue....
Step 4 - Confirm the Employees and their email addresses
Again, confirm the email addresses of the employees to be included in the mail out. Any employees without an email address will be displayed in red.
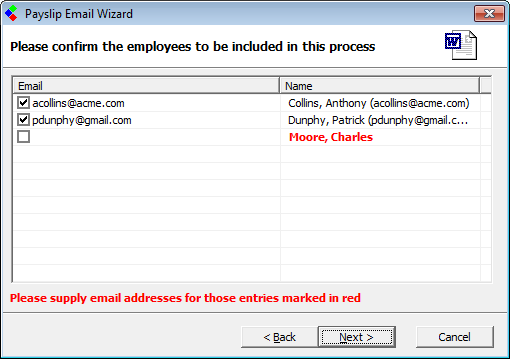
Email Payslips: Select Employees to Email Payslips too
To enter/edit an email address simply double click in the email column and enter the email address as shown in the following screenshot.
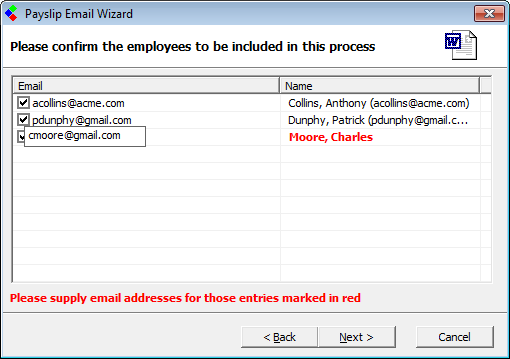
Email Payslips: Add Email Addresses if needed
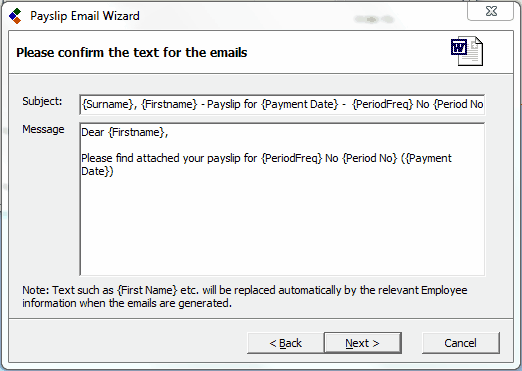
Click Next> to Continue....Step 5 - Confirm the Subject Message for the emails
This screen allows you to specify a standard subject and message for the emails you are sending to each employee. There are a number of data/parameter fields that you can use which will be inserted on an individual basis for each mail as follows:
{First Name} - The employee first name.
{Surname} - The employee surname.
{Period No} - The Week/Month/Period number for the payslip.
{Payment Date} - The Payment Date for the payroll entry.
{Period Freq} - The payroll frequency (Weekly, Monthly etc.)
Email Payslips: Confirm Layout of Email
Click Next> to Continue....
Step 6 - Add Attachments
You can specify additional/optional attachments to be added to the payslips. Such attachments will be added to each email payslip in the batch.
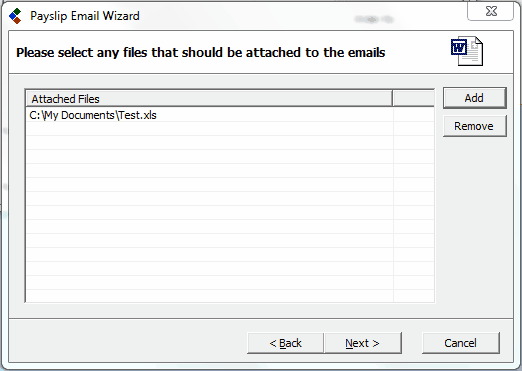
Email Payslips: Add an Additional File if required
Click Next> to Continue....
Step 7 - Specify Copy Emails
This step enables you to specify if anybody is to be copied on the emailed payslips by
1) A single email with all payslips attached
And / OR
2) As a CC on each individual email
A Master Password can be applied to each individual payslip which will enable any of the recipients to view any payslip without knowing the employee's private password. For example, if you were running a Payroll bureau, you may want to send all of the payslips to the Employer as a single email, with a master password which will allow the employer to view any of the individual passwords.
Please note that all passwords should be kept safe, and that they are case sensitive.
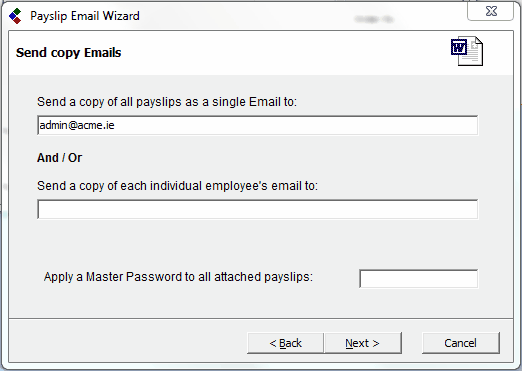
Email Payslips: Send Copy of Email to a single Address
Click Next> to Continue....
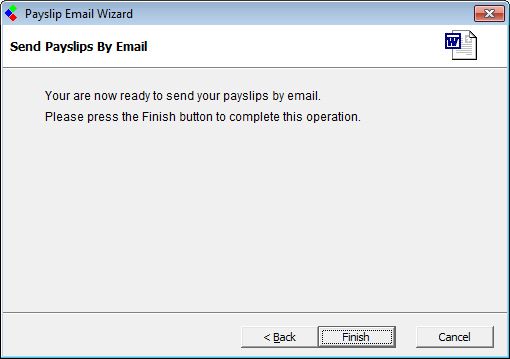
Step 8 - Sending the Payslips
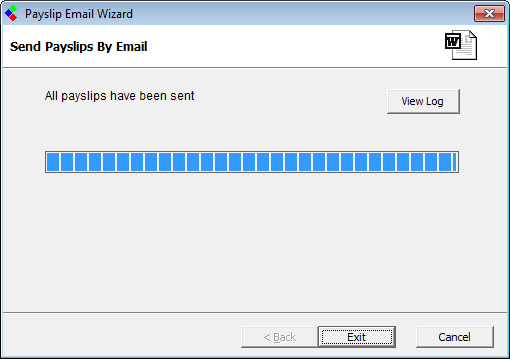
Click the Finish button to begin sending your email payslips. You will be advised of the current progress as it works through the batch.
When the processing is complete and you can press the Exit button to end the Wizard.
- Send employee payslips by emails using a simple 5 step Wizard.
- Protect each payslip with an individual password.
- Send copies of all payslips to specified people.
- Attach extra documents to each payslip email.
- Store copies of the emailed payslips in Microsoft Outlook.
Before you can start sending Email Payslips there are some settings that you must specify.
Email Server Settings
There are a number of settings that must be specified in CollSoft Payroll before you can begin sending Email Payslips.
These settings can be accessed by selecting the Email Settings option in the Tools menu in Payroll, you will see a screen similar to that shown below:
Email Payslips: User Specified Server Settings Screen
The individual settings are as follows:
Your Name: The name which will appear in the From line of each email that is sent.
E-mail Address: The Senders email address.
Mail Server: By default payroll will send email payslips using an email server hosted by CollSoft designed specifically to send payslips. Selecting the 'Collsoft Mail Server' option will instruct the payroll to email the payslips using the Collsoft hosted mail server and will gray out the User Specified Server fields as they are automatically populated with the Collsoft mail server details.
Email Payslips: Collsoft Mail Server Settings Screen
The user can specify their own mail server by selecting the "User Specified Server" option and completing the following required information;
Outgoing mail server (SMTP): This is the name or IP address of your outgoing email server. This information will have been provided to you by your Internet Service Provider (ISP), and is the same as specified in your email client software (Microsoft Outlook or Outlook Express)
You may also use the name of an Exchange mail server on your company's internal network where applicable.
Username/Password: This is the username and password required to log onto your mail server. Again, this information will have been supplied to you by your ISP or network administrator, and it will be the same as the username/password in Outlook/Outlook Express.
Note: If you are using an Exchange SMTP server on an internal network, you should provide your LAN username and password in these fields.
Password Authentication: This is the method by which passwords are sent to the email server. In most cases this will be Login (which is the default option) and should not be changed unless you are specifically required to. The possible options available are:
None - No password authentication are required.
POP - Authentication via POP3 session.
Login (Default) - Default authentication method.
Plain - Passwords are sent as plain text.
Server Timeouts: The time (in seconds) that Payroll will attempt to establish a connection with your mail server before giving up.
Outgoing Server Port: The TCP port on which your SMTP server is listening. The default value for this setting is 587, you should not change this value.
Save Email Payslips In Microsoft Outlook: This option is only available if you have Microsoft Outlook Installed on your PC - it will not be available for Outlook Express. When selected, Payroll will save a copy of each email sent in a special folder called Payslips located in your Sent Items folder. This folder is further broken down by tax year, company, period type (weekly, monthly etc.) and period number, making it easier to find individual items.
Email Payslips: Save Emails in Outlook
Employee Settings For Email Payslips
Before you can start sending Email Payslips you will have to update the following details in every employee to whom you will be sending payslips to. Two new fields have been added to the Employee Details screen for this purpose:
Email Payslips: Entering Employee's Email Address
The new fields are:
Email Address:
This field allows you to specify one or more email addresses for each employee. Multiple addresses can be entered by using commas or semi-colons (;) between the various addresses. For example, if you wanted to enter name1@acme.com and name2@acme.com as two addresses for a single employee, you would enter these as either name1@acme.com;name2@acme.com or name1@acme.com,name2@acme.com
Email Password:
This is the password that will be used to lock any payslips sent to this employee. This means the employee will need to enter the assigned password before they can view their PDF payslip.
These passwords should be communicated/agreed with each individual employee.
Please note: Passwords are not required, but we recommend using passwords for added security and privacy. Passwords are case sensitive.
Finally, when you are sending a batch of email payslips it is possible to apply a Master Password which will allow you (or anyone else with the correct password) to view any payslip without knowing the individual employee's password. This is useful if you are providing a payroll bureau service, and you want to send copies of the payslips to the relevant employer.
Sending Email Payslips
You will need to follow the steps outlined below to begin sending email payslips:
Step 1 - Run The Payroll
Run your payroll as you would normally do and click on the Payslips button to bring up the Print Payslips screen:
Email Payslips: Click on the Payslips Button
Step 2 - Select the employees to be included in the batch
Confirm the employees that you want to send the email payslips to by making sure there is a tick in the box in front of their name. Select the Email option in the "Print to" section. Click "Print Payslips" to start the Email Payslip wizard.
Email Payslips:Click Print Payslips
Step 3 - The Email Payslip Wizard
The Welcome to the Email Payslip Wizard screen appear, please press the Next button to continue.
Email Payslips: Payslips Email Wizard begins
Click Next> to Continue....
Step 4 - Confirm Senders name and Email Address
Confirm that the senders name and email address are correct.
Email Payslips: Senders name and email address
Click Next> to Continue....
Step 4 - Confirm the Employees and their email addresses
Again, confirm the email addresses of the employees to be included in the mail out. Any employees without an email address will be displayed in red.
Email Payslips: Select Employees to Email Payslips too
To enter/edit an email address simply double click in the email column and enter the email address as shown in the following screenshot.
Email Payslips: Add Email Addresses if needed
Click Next> to Continue....Step 5 - Confirm the Subject Message for the emails
This screen allows you to specify a standard subject and message for the emails you are sending to each employee. There are a number of data/parameter fields that you can use which will be inserted on an individual basis for each mail as follows:
{First Name} - The employee first name.
{Surname} - The employee surname.
{Period No} - The Week/Month/Period number for the payslip.
{Payment Date} - The Payment Date for the payroll entry.
{Period Freq} - The payroll frequency (Weekly, Monthly etc.)
Email Payslips: Confirm Layout of Email
Click Next> to Continue....
Step 6 - Add Attachments
You can specify additional/optional attachments to be added to the payslips. Such attachments will be added to each email payslip in the batch.
Email Payslips: Add an Additional File if required
Click Next> to Continue....
Step 7 - Specify Copy Emails
This step enables you to specify if anybody is to be copied on the emailed payslips by
1) A single email with all payslips attached
And / OR
2) As a CC on each individual email
A Master Password can be applied to each individual payslip which will enable any of the recipients to view any payslip without knowing the employee's private password. For example, if you were running a Payroll bureau, you may want to send all of the payslips to the Employer as a single email, with a master password which will allow the employer to view any of the individual passwords.
Please note that all passwords should be kept safe, and that they are case sensitive.
Email Payslips: Send Copy of Email to a single Address
Click Next> to Continue....
Step 8 - Sending the Payslips
Click the Finish button to begin sending your email payslips. You will be advised of the current progress as it works through the batch.
When the processing is complete and you can press the Exit button to end the Wizard.
Add Attachment.png
Add Attachment.png
Add email address.png
Add email address.png
Collsoft Mail Server.png
Collsoft Mail Server.png
Conrifm Employees.png
Conrifm Employees.png
DataImage61.png
DataImage61.png
DataImage97.png
DataImage97.png
Email Finish Button.png
Email Finish Button.png
Email Layout.png
Email Layout.png
Enter Employees Emaill Address.png
Enter Employees Emaill Address.png
Exit Email Wizard.png
Exit Email Wizard.png
Open Email Wizard.png
Open Email Wizard.png
Print Payslips Email.png
Print Payslips Email.png
Save in Outlook.png
Save in Outlook.png
Send Copy Payslips.png
Send Copy Payslips.png
Senders name and emaill.png
Senders name and emaill.png
User Specified Server.png
User Specified Server.png
Weekly Wages screen.png
Weekly Wages screen.png
 Get help for this page
